Handling node failures: retry strategies, timeouts, and error links
Last updated: November 11, 2026
Overview
When a node fails, gaiia gives you five tools to control what happens next: an error mapper to reshape the error before any other handling runs, retry strategies to re-run the node automatically, a timeout to limit how long a node can run, a skip configuration that lets operators manually resume a failed execution, and error links to route execution to a recovery path.
In this article, we'll be covering how each of these works, when to use them, and how they interact with each other.
Understanding how node failure works
When a node fails — whether from an API error, a utils.fail() call, a timeout, or an unhandled exception — the workflow engine evaluates error handling in a fixed order:
If an error mapper is configured, it runs first and reshapes the error before any other handling evaluates it.
If a retry strategy matches the error code, the node is scheduled for retry. No further handling runs until retries are exhausted.
If no retry applies (or retries are exhausted), the engine checks for an error link matching the error code. If one exists, execution continues from the linked node.
If none of these apply, the workflow execution fails and stops.
If the node is configured as skippable, an operator can manually skip the failed node from the execution detail view and resume the workflow.
Error mapper, retry strategies, timeout, and skip configuration are all set per node on its Error handling tab. Error links are drawn directly in the graph as branches off the node.
For more on triggering failures from code, see Using utils in Workflow Functions.
Using an error mapper to reshape errors
An error mapper is a TypeScript function that runs before retry strategies and error links. It lets you intercept the raw error from a failing node and reshape it — changing the error code, message, or payload — before the rest of the error-handling chain evaluates it.
This is especially useful when integrations return error detail buried inside nested payloads. For example, a SOAP API might return an HTTP 500 with a fault code hidden in the response body. Without an error mapper, you'd need to build separate logic to extract that code. With one, you handle it inline on the node.
Error mappers are configured on the node's Error handling tab in the Error mapper section. They are available on all action nodes and while loop nodes.
For a complete guide to writing and configuring error mappers, see Using the Error Mapper.
Configuring retry strategies
A retry strategy tells the engine to re-run a failed node automatically after a delay, without any manual intervention. This is useful when a failure is likely transient — a momentary API unavailability, a provisioning system that isn't ready yet, or a record that hasn't propagated.
Each retry strategy has three settings:
Error codes — the error code(s) that trigger this strategy. Must match the
codepassed toutils.fail()or returned by the node. Use*to match any error code.Interval (seconds) — how long to wait between each retry attempt.
Max number of retries — how many times to retry before giving up (1–1000).
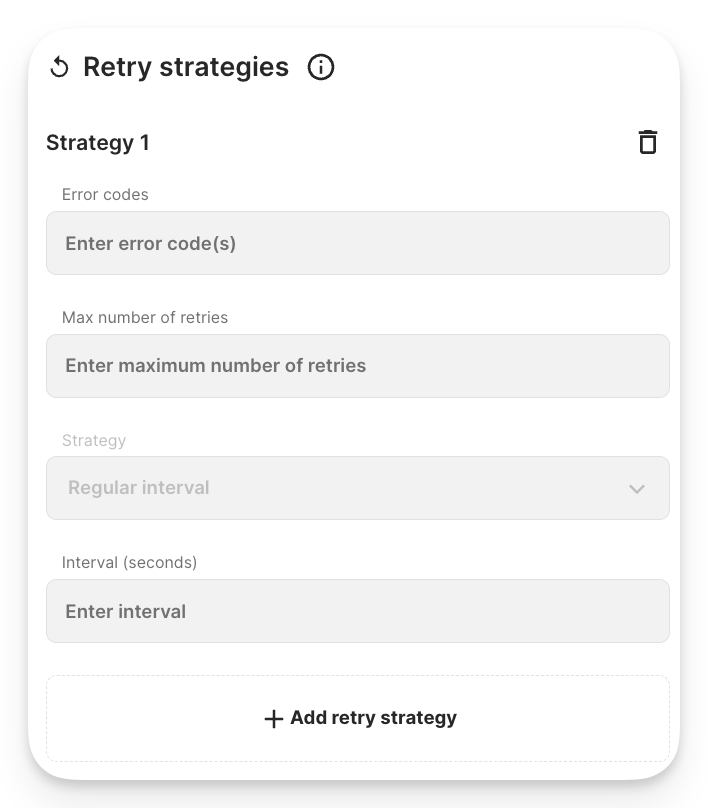
To add a retry strategy, open the node's Error handling tab and click Add retry strategy. You can add multiple strategies — one per error code or group of codes — to handle different failure types differently.
Error codes must be unique across all retry strategies on a node — the same code cannot appear in two strategies. Use * as a catch-all in a separate strategy if you want specific codes to have their own retry behavior and everything else to follow a default.
Example: retry on a specific error, catch-all for others
A node calls an external provisioning API. The API sometimes returns a DEVICE_NOT_READY error when the device hasn't finished initializing — a transient condition worth retrying frequently. Any other error is less predictable, so a slower, more conservative retry applies.
Strategy 1
  Error codes: DEVICE_NOT_READY
  Interval: 30 seconds
  Max retries: 10

Strategy 2
  Error codes: *
  Interval: 300 seconds
  Max retries: 3
When the node fails with DEVICE_NOT_READY, Strategy 1 applies. Any other error code falls through to Strategy 2. If all retries are exhausted without success, the engine then checks for an error link.
Setting a timeout
A timeout sets the maximum number of seconds a node is allowed to run before the engine forcibly fails it. Without a timeout, a node waiting on a slow or unresponsive external system can hold up the entire workflow execution indefinitely.
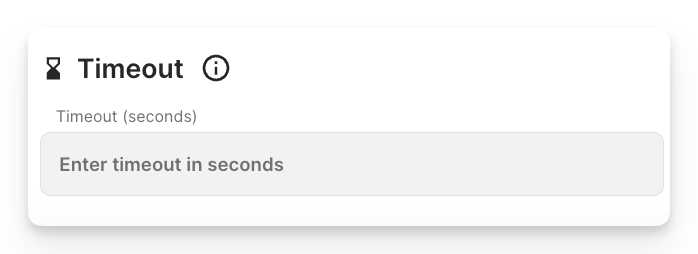
To set a timeout, open the node's Error handling tab, locate the Timeout section, and enter a value in the Timeout (seconds) field. Leave it empty for no timeout.
A timeout failure is treated like any other node failure — the error mapper (if configured), retry strategies, and error links all apply. If you want the workflow to recover gracefully from a timeout, add an error link on the node and use * or a specific timeout error code to route execution to a recovery step.
Configuring a node as skippable
Skip configuration lets you mark a node as manually resumable. If the node fails and all automatic error handling (retry strategies, error links) has been exhausted, an operator with the right permissions can skip the failed node execution and continue the workflow manually.
When skipping, the workflow resumes from the next node. What the skipped node passes downstream depends on whether an output schema is configured:
With output schema: The operator is prompted to supply the output data. The workflow resumes using that data.
Without output schema: The node is skipped with no output. Any downstream node that references this node's output will receive
undefinedand may fail.
We recommend configuring an output schema whenever downstream nodes depend on output from a skippable node.
To configure a node as skippable, open the node's Error handling tab and, in the Skip section, check Allow skipping if this node fails. Optionally, define an Output schema using JSON Schema to describe the output shape a user must supply when skipping.
For a complete guide to skipping failed nodes, see Skipping Failed Nodes.
Adding error links
An error link connects a failing node to a recovery node, letting execution continue down an alternative path instead of stopping the workflow. The recovery node can log the failure, notify your team, attempt a fallback action, or simply end the workflow cleanly with a structured result.
Unlike the other error handling features, error links are not configured on the Error handling tab — they are drawn directly in the graph as branches from the node's error output.
To add an error link, hover over the node in the graph and drag from the error output to the recovery node. Once connected, click the link to open the Error handling panel, where you set the Error codes that trigger this path. Use * to match any error code.
A node can have multiple error links, each targeting different error codes and routing to different recovery nodes. Specific error codes always take priority over * when both match.
When a node follows an error link, it still shows as Failed in the execution log. The workflow execution itself does not fail — it continues along the error path.
Example: notify on failure, then stop cleanly
A provisioning node fails. Rather than leaving the workflow in a failed state with no context, an error link routes to a Create Activity Log Comment node that records what went wrong, then to an End node.
Provisioning node
  → Error link (error codes: *)
    → Create Activity Log Comment ("Provisioning failed: see execution log for details")
      → End
Combining error handling strategies
All five tools can be used together. The engine evaluates them in sequence: error mapper reshapes first, then retries run, then error links route, and skip remains available if all else fails.
Example: layered error handling with mapper, retry, and link
An HTTP request node calls an external API that returns nested SOAP faults. The builder wants specific fault codes to retry, and everything else to notify the team.
HTTP request node
  Error mapper: extracts fault code from response.body.Envelope.Body.Fault.faultcode
  Retry strategy: SERVICE_UNAVAILABLE → 60s interval, 5 retries
  Error link: * → Notify team → End
The API returns HTTP 500 with a SOAP fault. The raw error code is
HTTP_500.The error mapper extracts
SERVICE_UNAVAILABLEfrom the fault and returns it as the new error code.The retry strategy matches
SERVICE_UNAVAILABLEand retries up to 5 times.If all retries fail, the
*error link fires and the notification node runs.
Example: timeout with skip as fallback
A provisioning node can take up to 5 minutes. If it times out, the team wants the option to skip it manually and continue the workflow.
Provisioning node
  Timeout: 300 seconds
  Skip: enabled, with output schema for { provisioningId: string }
If the node runs longer than 300 seconds, the engine fails it with a timeout error.
Since no retry strategy or error link is configured, the workflow execution stops.
An operator opens the failed execution, reviews the timeout, and clicks
Skip node.The operator supplies a
provisioningIdvalue, and the workflow resumes from the next node.
If a retry strategy is configured for * and an error link is also configured for *, the retry strategy runs first and the error link only fires after retries are exhausted. Make sure your max retry count and interval reflect how long you're willing to wait before the error link takes over.