Setting up NMI integration
Last updated: November 4, 2026
Overview
This article explains how to connect your NMI Payment Gateway to gaiia. You’ll need to create security keys in NMI, set up a webhook, and then configure the integration in gaiia.
Step 1: Gather your NMI credentials
Private and public security keys
gaiia requires both a Private Security Key and a Public Security Key to process payments through NMI.
- Log in to your NMI Payment Gateway instance
- Click on My Settings in the top menu
- Select Security Keys
- Click Add a New Private Key
- Key Name: For example, “gaiia NMI Integration”
- Username: Your NMI username
-
Key Permission: Check API

- Click Create to save
- Scroll to Public Security Keys and click Add a New Public Key
- Key Name: Same format as private key
- Username: Your NMI username
-
Key Permission: Select Tokenization
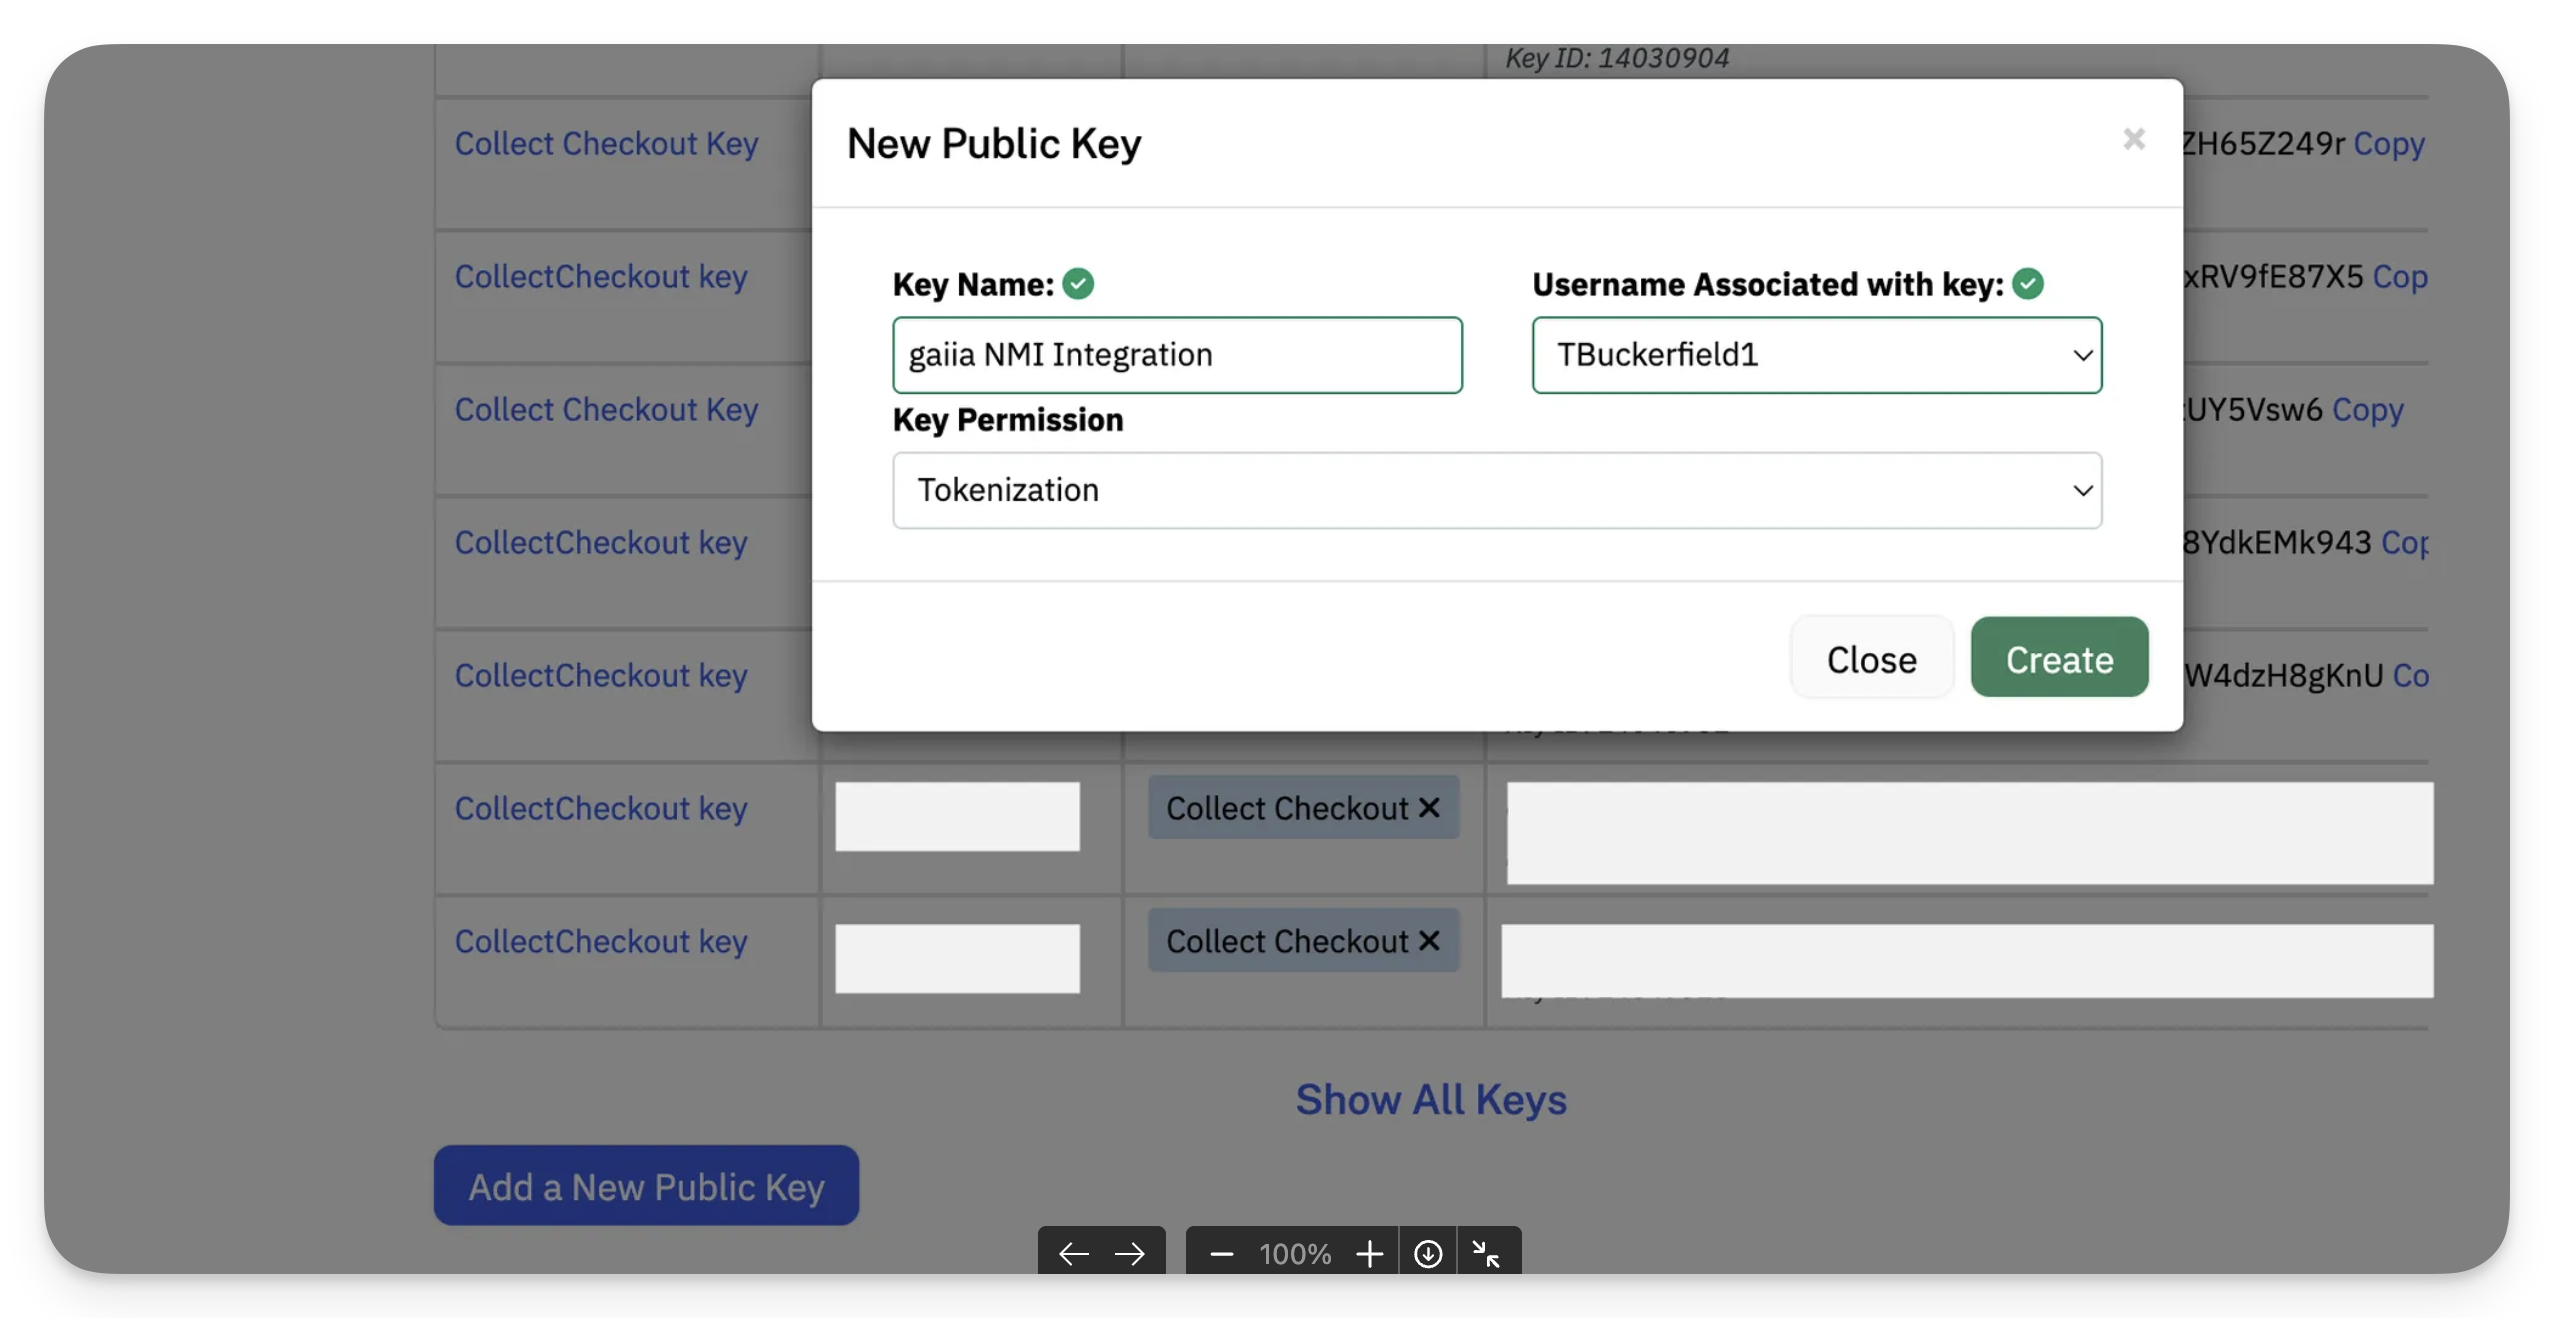
- Click Create to save
Make sure to copy both keys. You’ll need them later to complete the integration in gaiia.
Webhook setup
Webhooks allow gaiia to receive real-time payment updates from NMI, including returns and chargebacks.
- Click on My Settings in the top menu
- Select All Settings
- Scroll to the Transaction Options section and click Webhooks
- Click Create
- Use the following settings:
-
URL: the Webhook URL displayed in gaiia.
To get it, open gaiia in a new browser tab and go to Settings > Integrations > App directory. Click
Installon NMI, clickNext, then clickAdd configuration. Copy the Webhook URL with the copy icon next to it. It follows the formathttps://webhooks.gaiia.systems/nmi//. Keep this tab open: you will finish the configuration in it in Step 2. -
Available Events:
- transaction.check.status.latereturn
- transaction.check.status.return
- transaction.check.status.settle
- transaction.void.success
-
- Click Save Changes
Make sure to copy the Signing Key displayed in the Endpoints area. It will also be required when connecting NMI in gaiia.

Step 2: Configure NMI in gaiia
- Go to the Admin Settings menu
- Select Integrations, then go to the App Directory tab
- Find NMI under the Payments category and click
Install - Select the payment types you'll be accepting and click
Next - Check that the Webhook URL displayed matches the URL set in NMI. If you closed the gaiia tab and it changed, update the NMI webhook with the URL shown in gaiia.
- Enter the following:
- Private Security Key
- Public Security Key
- Webhook Signing Key
- Click
Connectto finish setup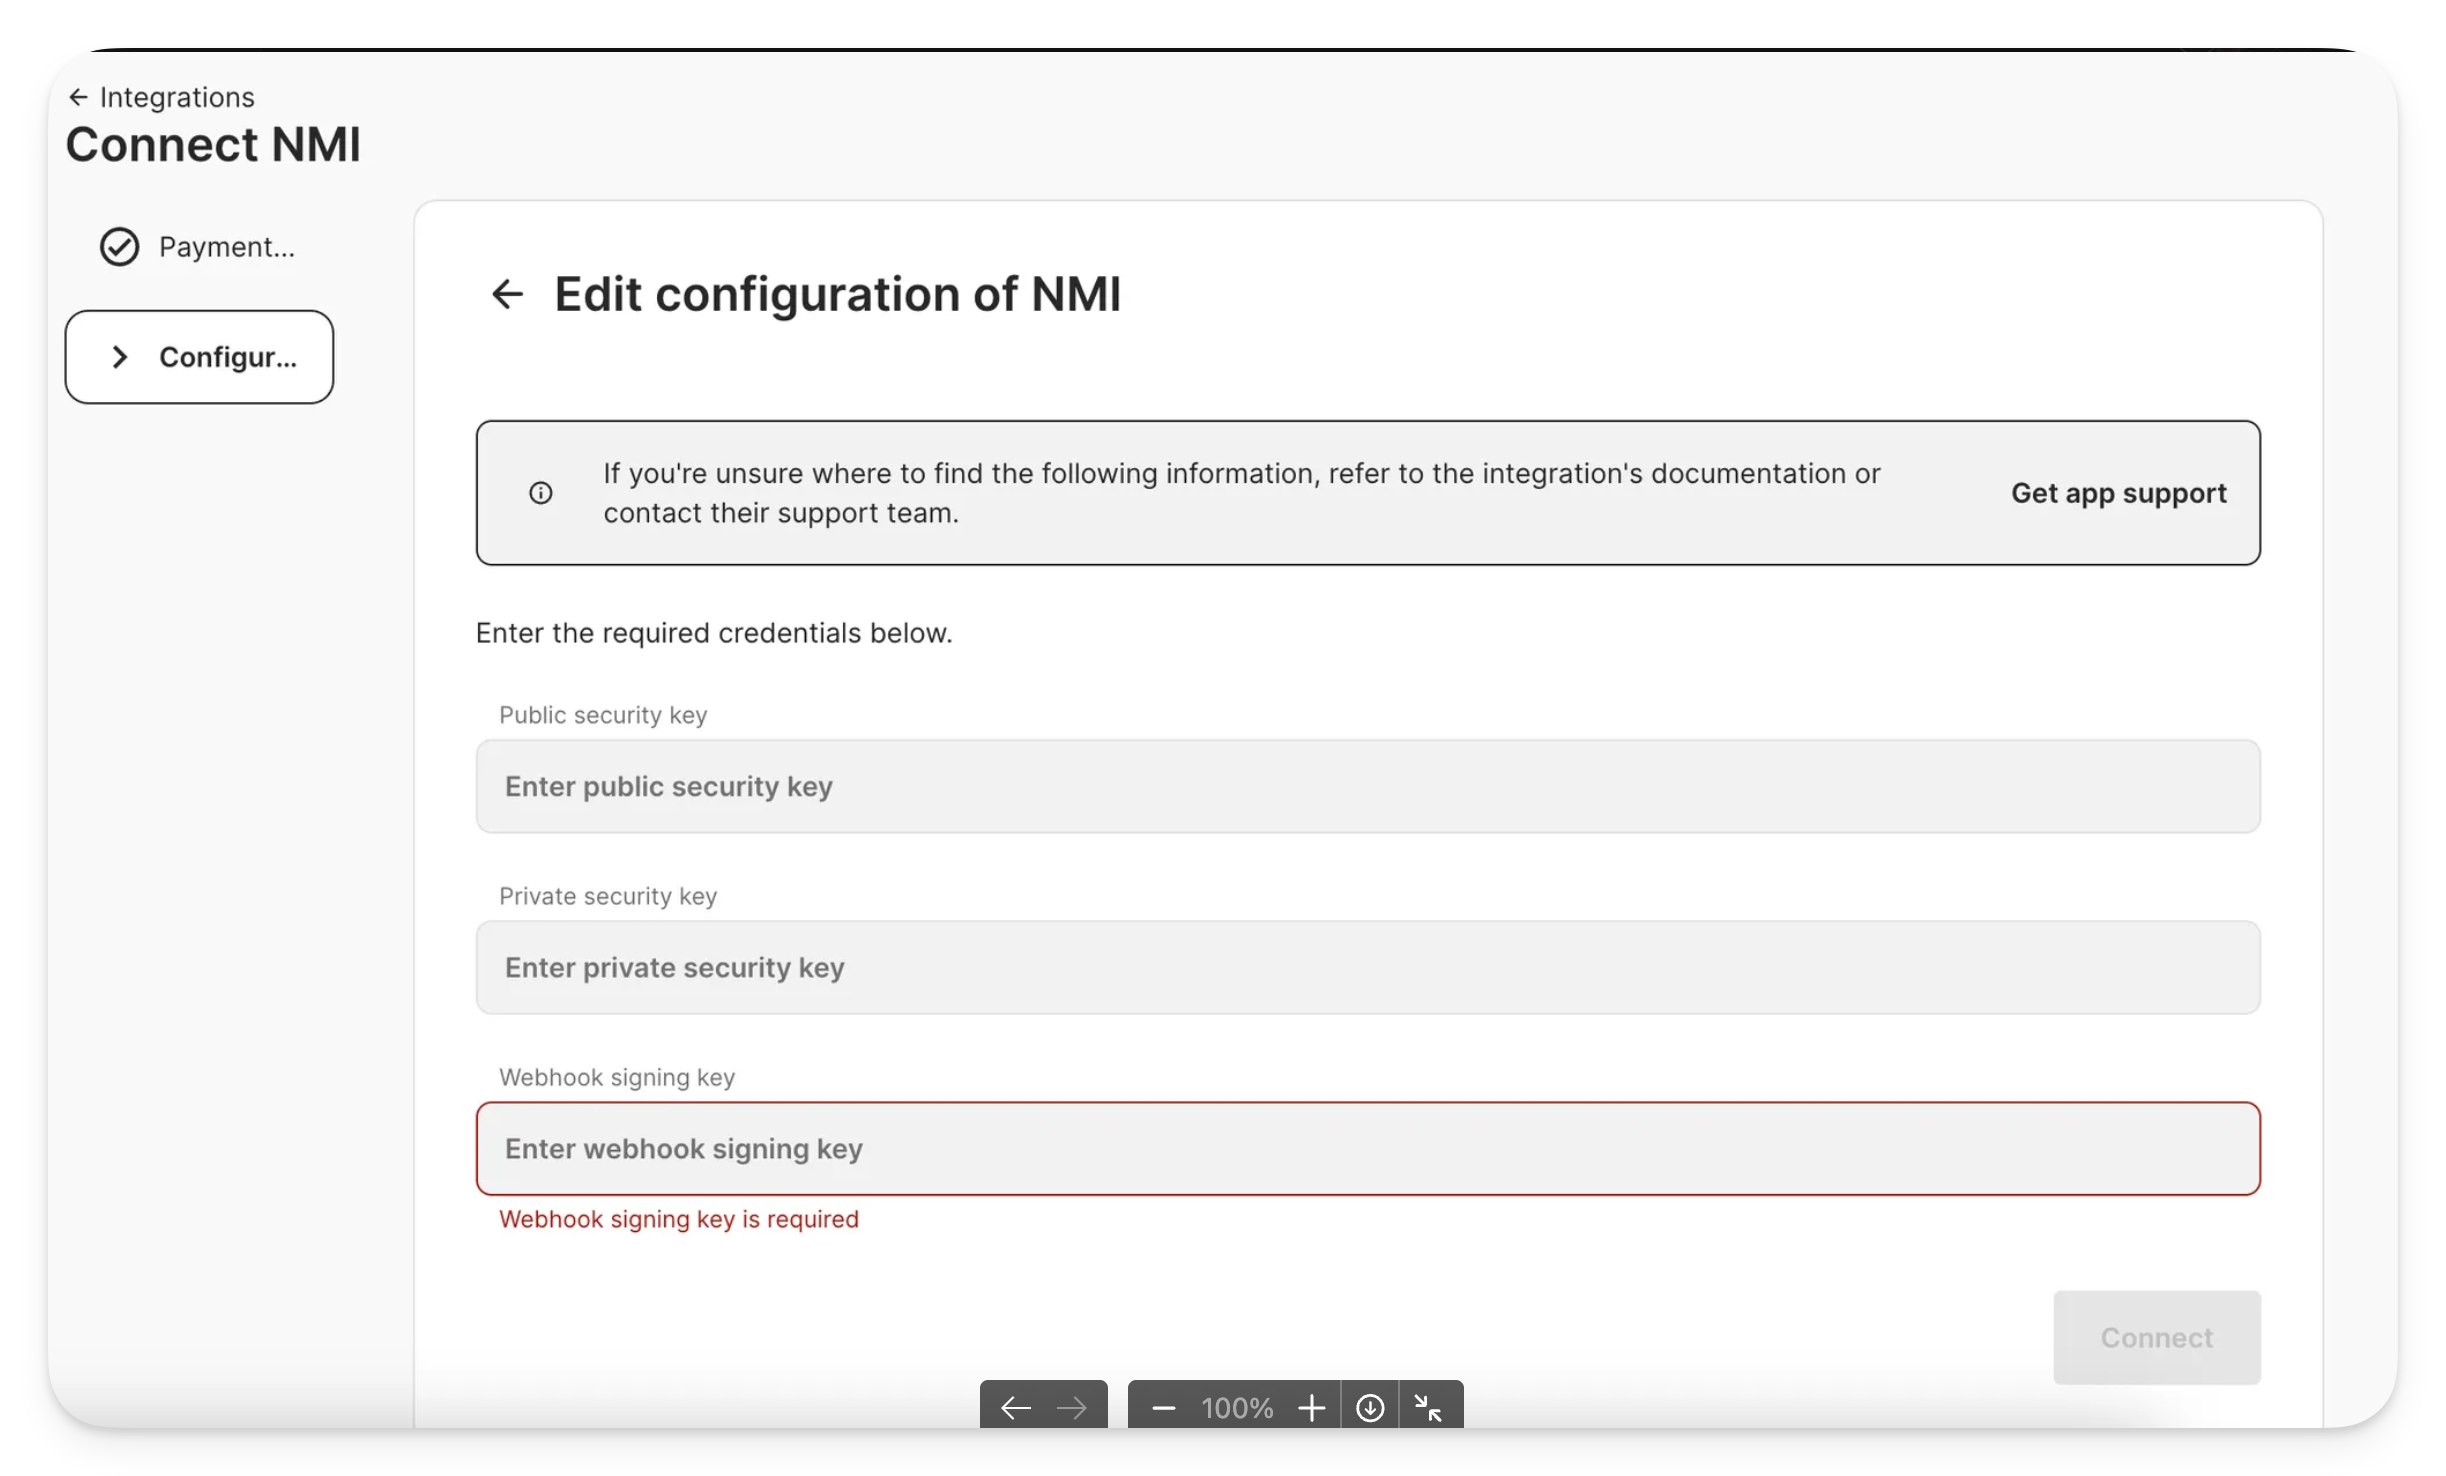
Once connected, you can begin processing payments and receiving updates through the NMI gateway.