Adding Sub-Accounts to a Business Account
Last updated: November 6, 2026
Overview
A multi-location customer is managed as a Parent Account with one Sub-Account per location. Each Sub-Account has its own address, contacts, services and equipment. Its subscriptions are billed either to the Parent Account or to the Sub-Account itself.
This article covers how to create a Sub-Account and how to change who pays for it afterwards. For an introduction to Business Accounts, see Business Accounts Overview.
Before you start
Creating a Sub-Account requires the Business accounts > Edit permission.
Any standalone Business Account becomes a Parent Account as soon as its first Sub-Account is created.
A Sub-Account cannot have Sub-Accounts of its own. The Sub-accounts tab does not appear on a Sub-Account.
An existing Business Account cannot be attached to a Parent Account from the app, and a Sub-Account cannot be detached or moved to another parent. Contact gaiia support for these changes.
If the Parent Account pays for the Sub-Account, the Parent Account's billing cycle must be enabled before subscriptions can be added to the Sub-Account.
Creating a Sub-Account
Sub-Accounts are created from the Parent Account, through a guided form.
A. Open the form
Open the Parent Account (or the standalone account that will become the parent) from the Businesses tab.
Open the Sub-accounts tab and click
New sub-account.
B. General information
Enter the Sub-account name.
Select the Account type.
Under Physical address, search for the location's address in Find address and select it.
Click
Next.
C. Contact
By default, the Sub-Account uses the Parent Account's primary contact for all communications.
Under Who should be the primary contact for this sub-account?, keep the parent's contact or select Set a new primary contact and enter the contact's details.
(Optional) Click
Add secondary contactto add another person who should be reachable for specific matters.Click
Next.
D. Account details
(Optional) Select the Account managers. The parent's account managers are suggested.
Fill in the Additional information fields. These are your organization's Business custom fields, and some may be required.
Click
Next.
E. Invoice settings
Under Who will be in charge of paying the invoices?, select:
Parent account to bill all subscriptions added to the Sub-Account to the Parent Account.
Sub-account to bill all subscriptions added to the Sub-Account to the Sub-Account itself.
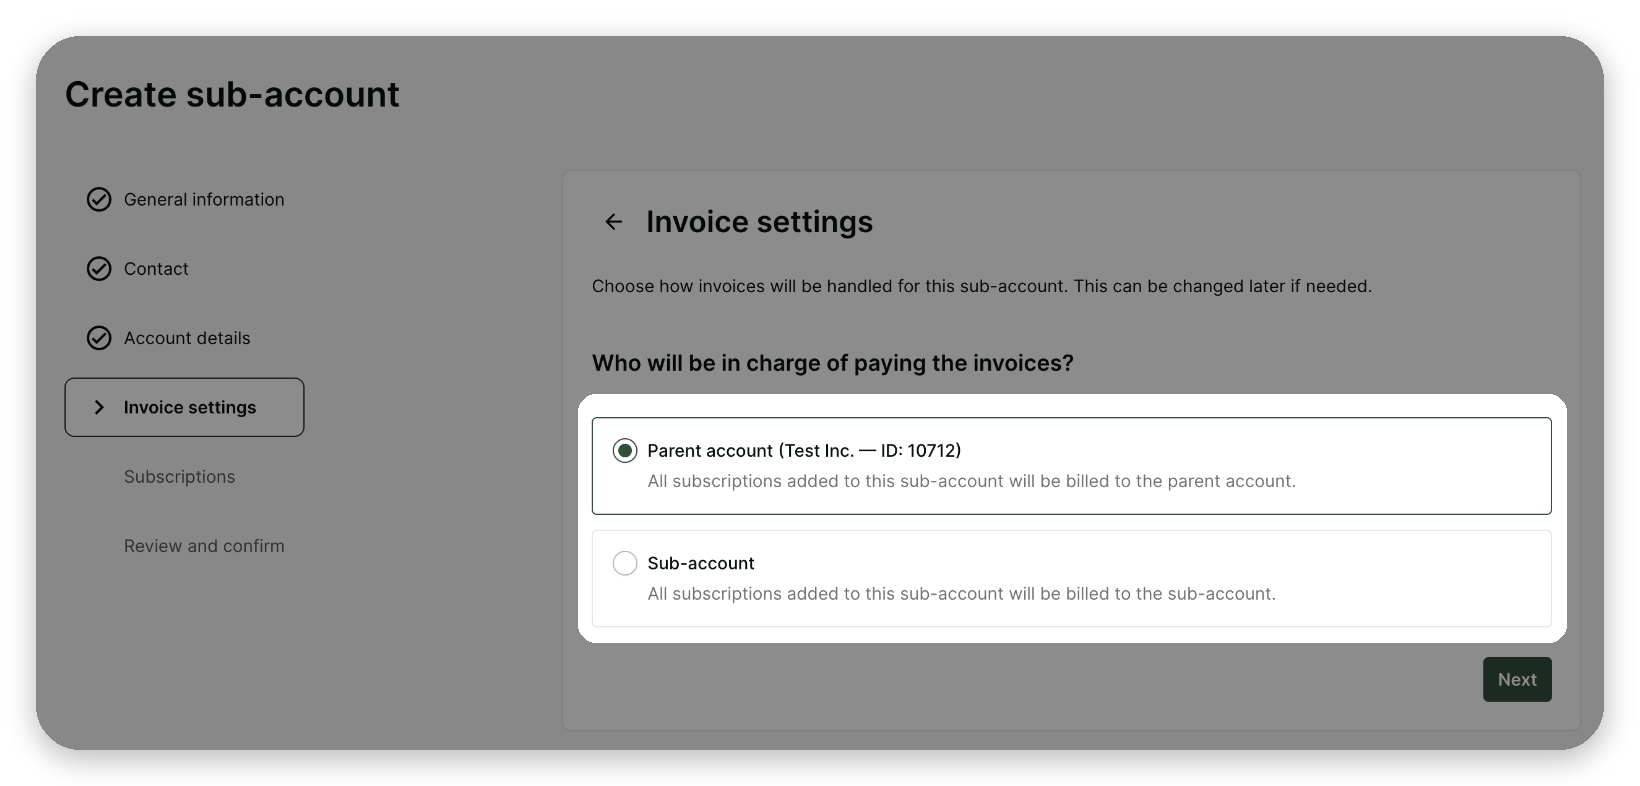
Click
Next.
F. Subscriptions and confirmation
(Optional) Select the subscription products to add to the Sub-Account. Subscriptions can also be added later from the Sub-Account's Billing tab.
If the Parent Account pays and its billing cycle is not enabled yet, a warning appears and products cannot be added. Finish creating the Sub-Account, then add subscriptions once the parent's billing cycle is enabled.
Click
Next.Review the details. Click the pencil icon next to a section to change it.
Click
Create sub-account.
The new Sub-Account appears in the Parent Account's Sub-accounts tab and in the Businesses table, where the Account Relationship filter can show "Parent Accounts" or "Sub-Accounts" only.
Changing who pays for a Sub-Account
The choice made at creation can be changed at any time. It applies to subscriptions only; one-time charges and discounts stay on the account where they were created.
Open the Sub-Account and go to its Billing tab.
Open Settings.
On the Subscriptions invoice responsibility card, click
Edit.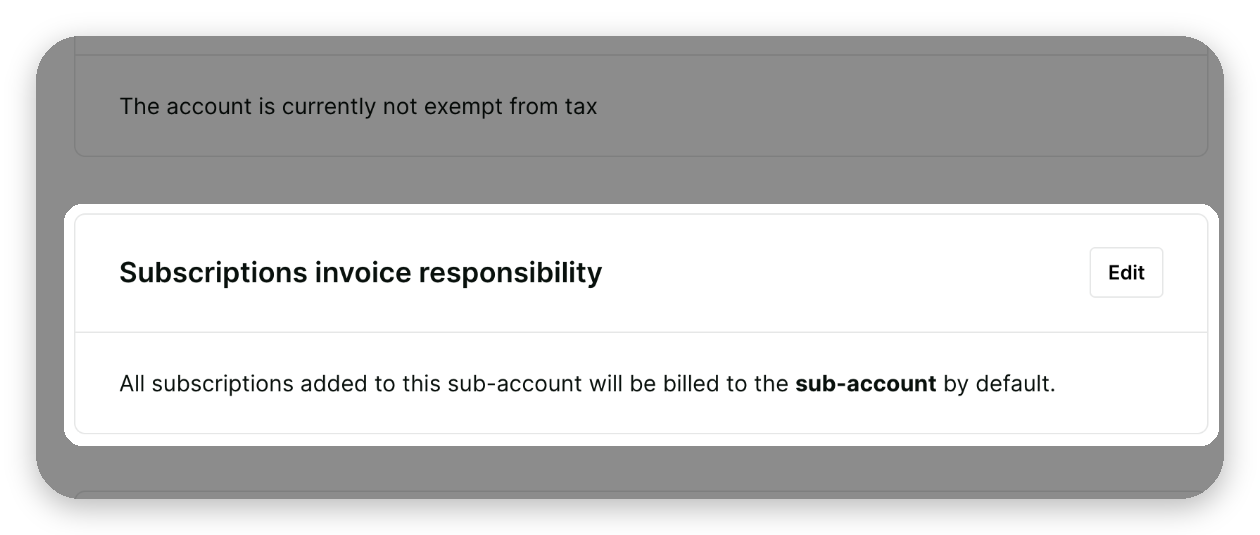
Select Parent account or Sub-account, then click
Save.