Updating information on a Business Account
Last updated: November 6, 2026
Overview
Once a Business Account is created, its information stays editable from the account page. Most of it lives in the Details panel on the right side of the page. The account status sits in the page header, and communication preferences sit in the Settings tab.
This article covers how to edit general information, addresses, additional information, contacts, the account status, and customer preferences. For an introduction to Business Accounts, see Business Accounts Overview.
Editing account information, addresses and contacts requires the Business accounts > Edit permission. Changing the status requires the Business accounts > Statuses permission.
Editing general information
General information holds the account name, the account type and the account managers. The account name is the one that appears on invoices.
Open the Business Account from the Businesses tab.
In the Details panel, open the Info tab.
Next to General information, click the pencil icon.

In the Edit general information window, update the Account name, Account type or Account managers.
Click
Save.
Editing addresses
A Business Account has a physical address (where the service is delivered) and a mailing address.
In the Details panel, open the Info tab.
Next to Addresses, click the pencil icon.
In the Edit addresses window, select the new Physical address, Mailing address, or both.
Click
Next, review the addresses, thenSave.
Editing additional information
Additional information holds the custom fields your organization has configured for Business Accounts, such as an SLA tier or a Circuit ID. This section only appears when at least one Business custom field exists.
In the Details panel, open the Info tab.
Next to Additional information, click the pencil icon.
Update the fields in the Edit additional information window.
Click
Save.
Managing contacts
The primary contact receives billing communications. Secondary contacts can be added for anyone else who should be reachable for specific matters.
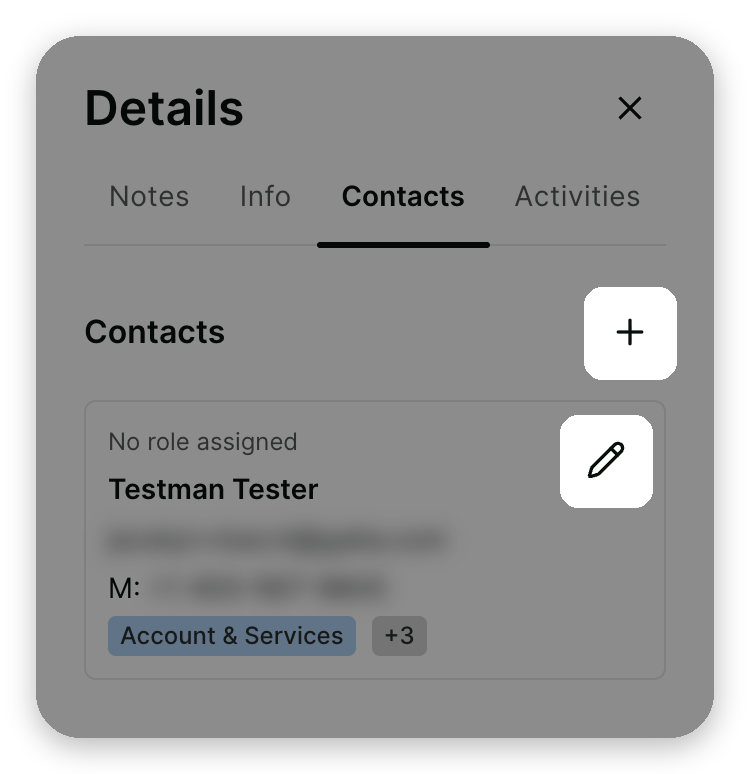
In the Details panel, open the Contacts tab, then:
To add a contact, click the + icon next to Contacts, fill in the contact's details, and click
Add.To edit a contact, click the pencil icon on the contact's card. In the Edit contact window, update the name, phone numbers, email address, role or Communication types, then click
Save.To remove a contact, open the Edit contact window and click
Remove contact.
Communication types control which notifications a contact receives: Account & Services, Billing & Payments, Orders & Checkout and Work Orders.
On a Parent Account, sub-accounts can share the parent's primary contact. Editing that contact on the parent also updates it on those sub-accounts. A warning in the Edit contact window says how many sub-accounts are affected.
On a sub-account that uses the parent's primary contact, edit the contact from the Parent Account.
A contact linked to the client portal cannot be removed.
Changing the account status
Business Accounts use the custom statuses configured for your organization.
Changing the status does not start or stop billing. Billing is started and stopped by running a workflow on the account.
In the page header, click the current status next to the account name.

Select the new status.
In the Change account status window, check I acknowledge, then confirm.
Without the Business accounts > Statuses permission, the status is displayed as a read-only tag.
Updating customer preferences
Customer preferences set the language and channels used to communicate with the account.
Open the Settings tab of the Business Account.
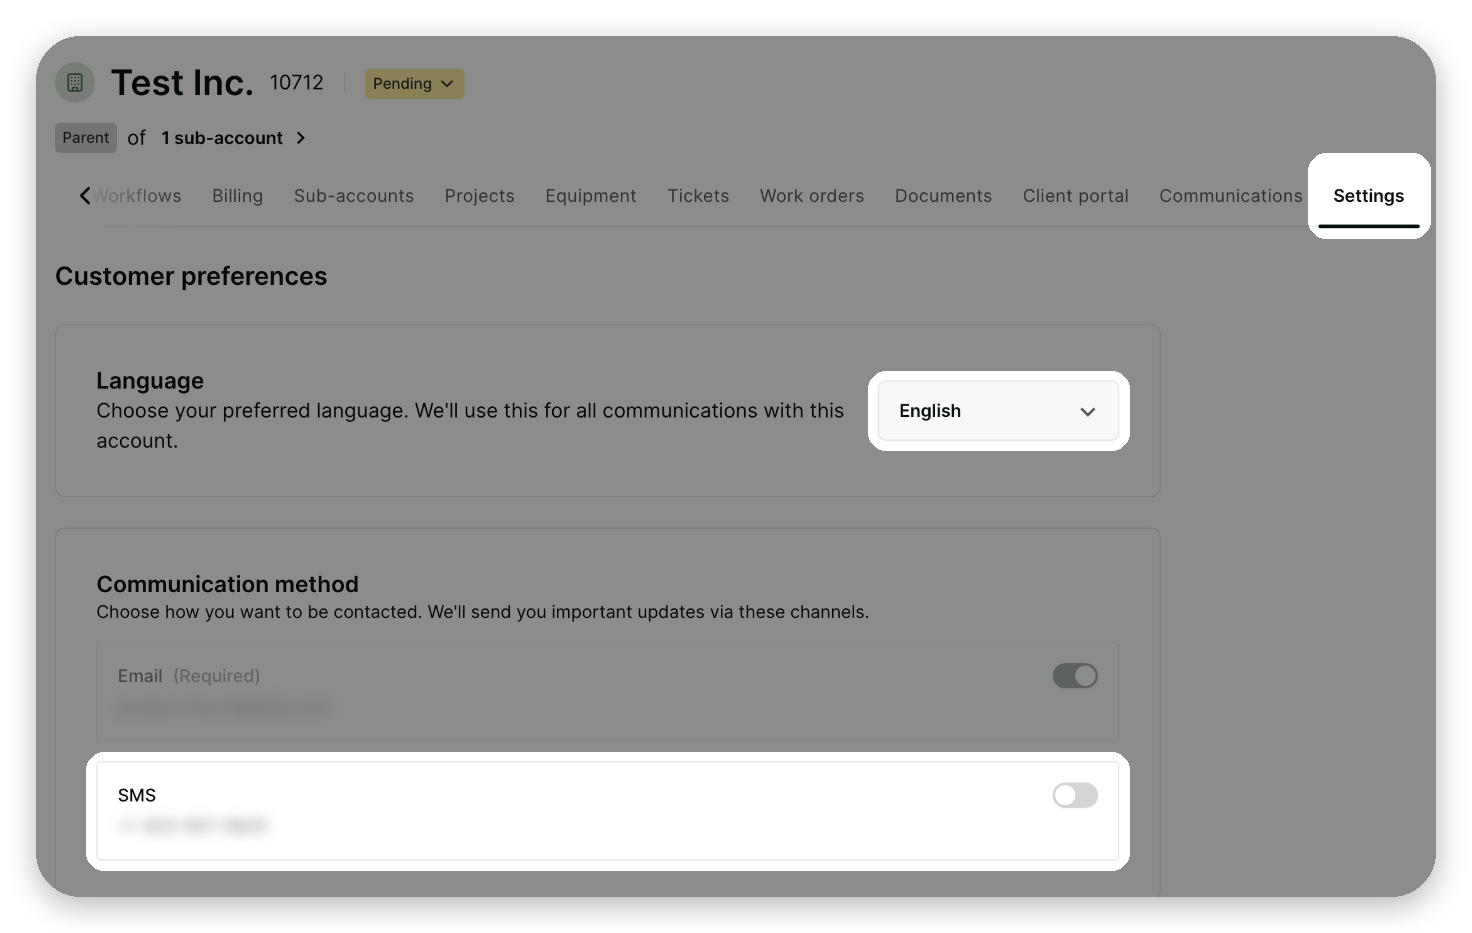
Under Language, select the account's preferred language.
Under Communication method, turn SMS on or off.
Changes are saved immediately; there is no Save button.
Email is always on and cannot be turned off.
SMS can only be turned on when the primary contact has a mobile phone number.